Our goal at Kurate.it is to make email automation easier. After getting frustrated with creating our own automated email series, we decided to write this how-to series that will walk you through a step-by-step setup of several different tools you need to build your email list and start your automated email campaign with WordPress, Emma, and Optinmonster.
This guide will walk you through setting up the Optinmonster – Emma integration and ensuring that your automated emails are triggered when a user signs up on your website.
Here are a few reasons you might want to collect email addresses from the people who visit your site:
- Opt-in email lists are the best way to get your content to people who are interested in what you have to say or what you have to sell. In fact, the growth in email marketing ROI is outpacing other digital marketing channels, rising from 66% to 73% since 2008 (Source: 2016 Email Marketing Census by Adestra).
- Visitors who give you their email address are what we like to call enthusiasts (they are really interested in whatever you are doing). An email list full of enthusiasts gives you a direct line of communication to those who are the most interested in hearing what you have to say (never again spend 4 hours on a blog post only to have one person read it).
- Offer exclusive courses, unique products or special sales to enthusiasts.
- Test products before launching them. Want to know if a product will sell? Ask your email subscribers for feedback. If enthusiasts aren’t interested in buying, chances are, others won’t be interested either.
These are just a few of the many reasons that you need (yes, NEED) to dedicate time, effort and a portion of your budget to effectively gathering emails on your site. Notice, I said effectively. Simple sign up forms in your footer aren’t going to cut it. You need a strategic approach to collecting emails and building your following, which leads me to my next questions
Ever wonder how to get those pretty pop-up boxes on your site so that you can collect email addresses from your site visitors? What about those full-screen messages that show up when visitors try to leave your site? Well, there are a couple of options:
- Pay a developer a bunch of money to build you a custom pop-up that you won’t be able to change.
OR
- Use a service like Optinmonster that will allow you to create, track and edit several campaigns for as low as $9/month.
Setting up an Optinmonster account and building campaigns are easy. The only tricky part is connecting your Optinmonster account to you email marketing service. Fear not! We have outlined all the steps to setup, create campaigns and connect your Optinmonster campaigns to an email marketing service below. We’ve decided to highlight the Optinmonster connection with Emma! The Emma customer service is second to none and they are constantly releasing updates that are actually useful for their customers.
Here are seven quick and easy steps to setting up your first OptinMonster campaign with Emma:
1. Sign up for OptinMonster
Optinmonster is not only the best way to gather email addresses on your site; it’s also the easiest to set up! Optinmonster allows you to create and A/B test beautiful lead capture forms without a developer (saving you time and money… double bonus!). $9/month gets you everything you need to start building a following on your site. Sign up for you account here.
If you’re not convinced, watch this video for a bit more on the features and value of Optinmonster:
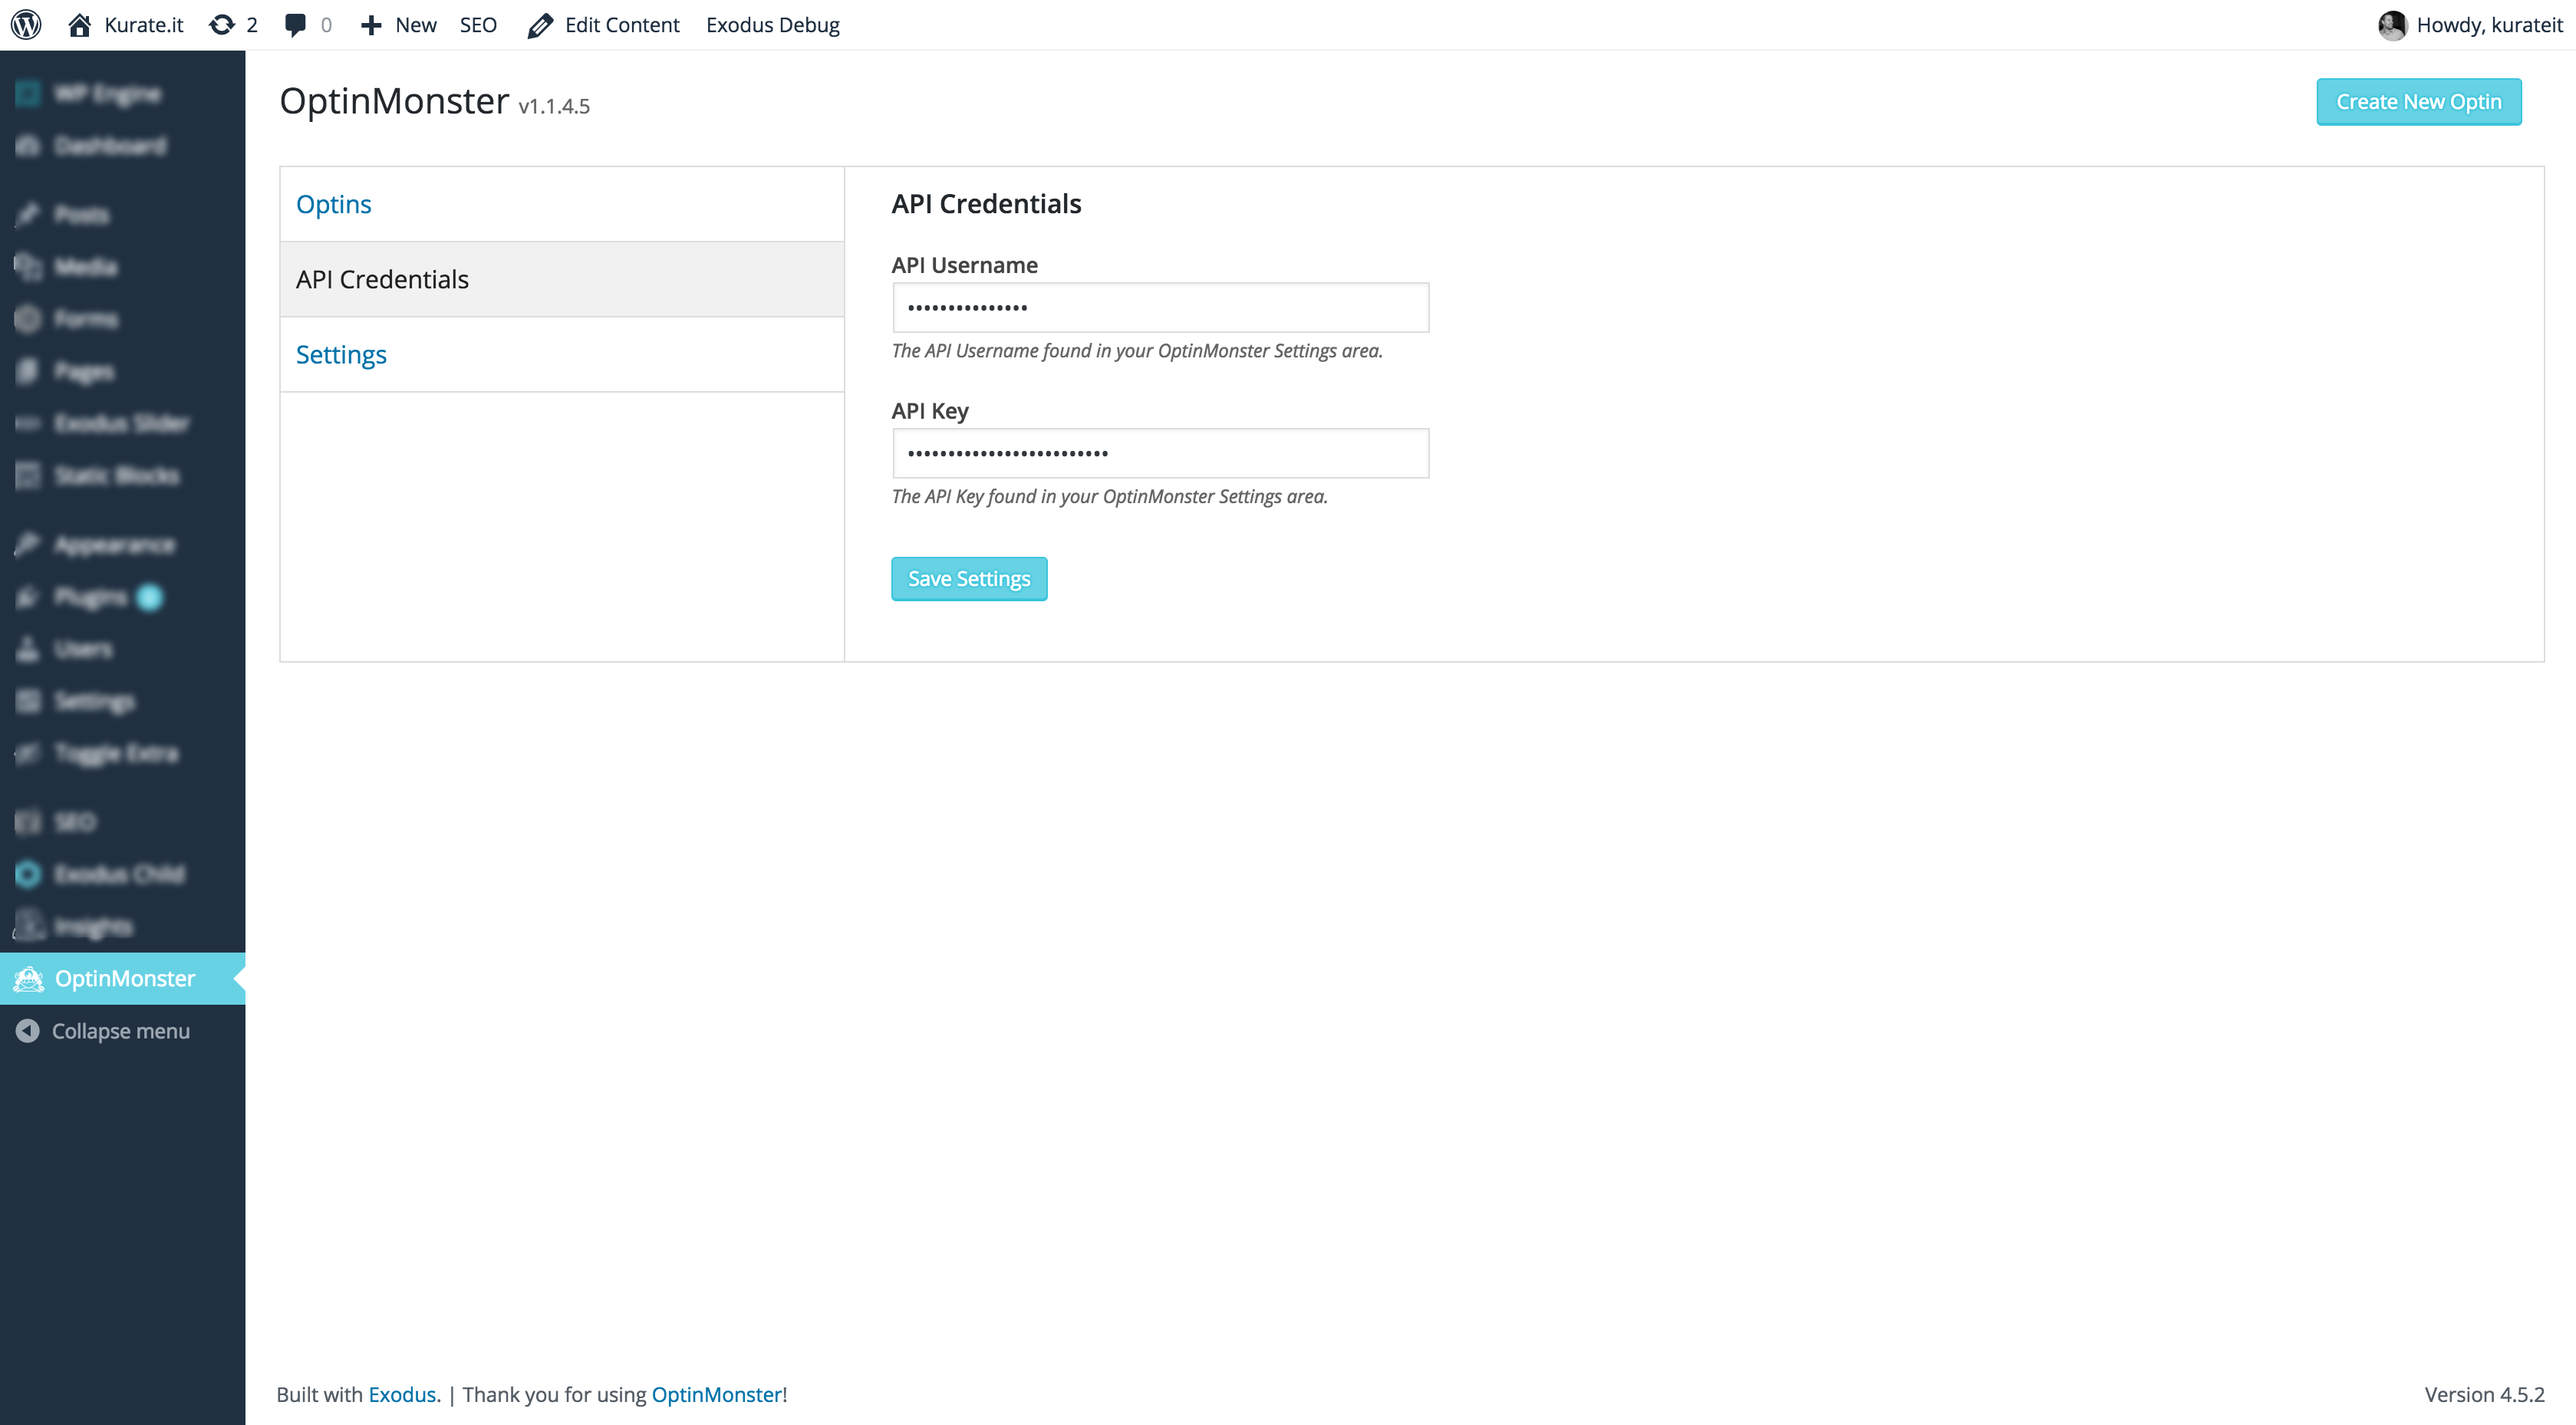
2. Install the OptinMonster WordPress plugin
Download the plugin here. Once you’ve installed the plugin, you’ll need to enter your API Username and API Key in the OptinMonster tab in your WordPress backend in order to connect your website to your OptinMonster account. You can access your OptinMonster API information from the API tab when you are logged into your account.
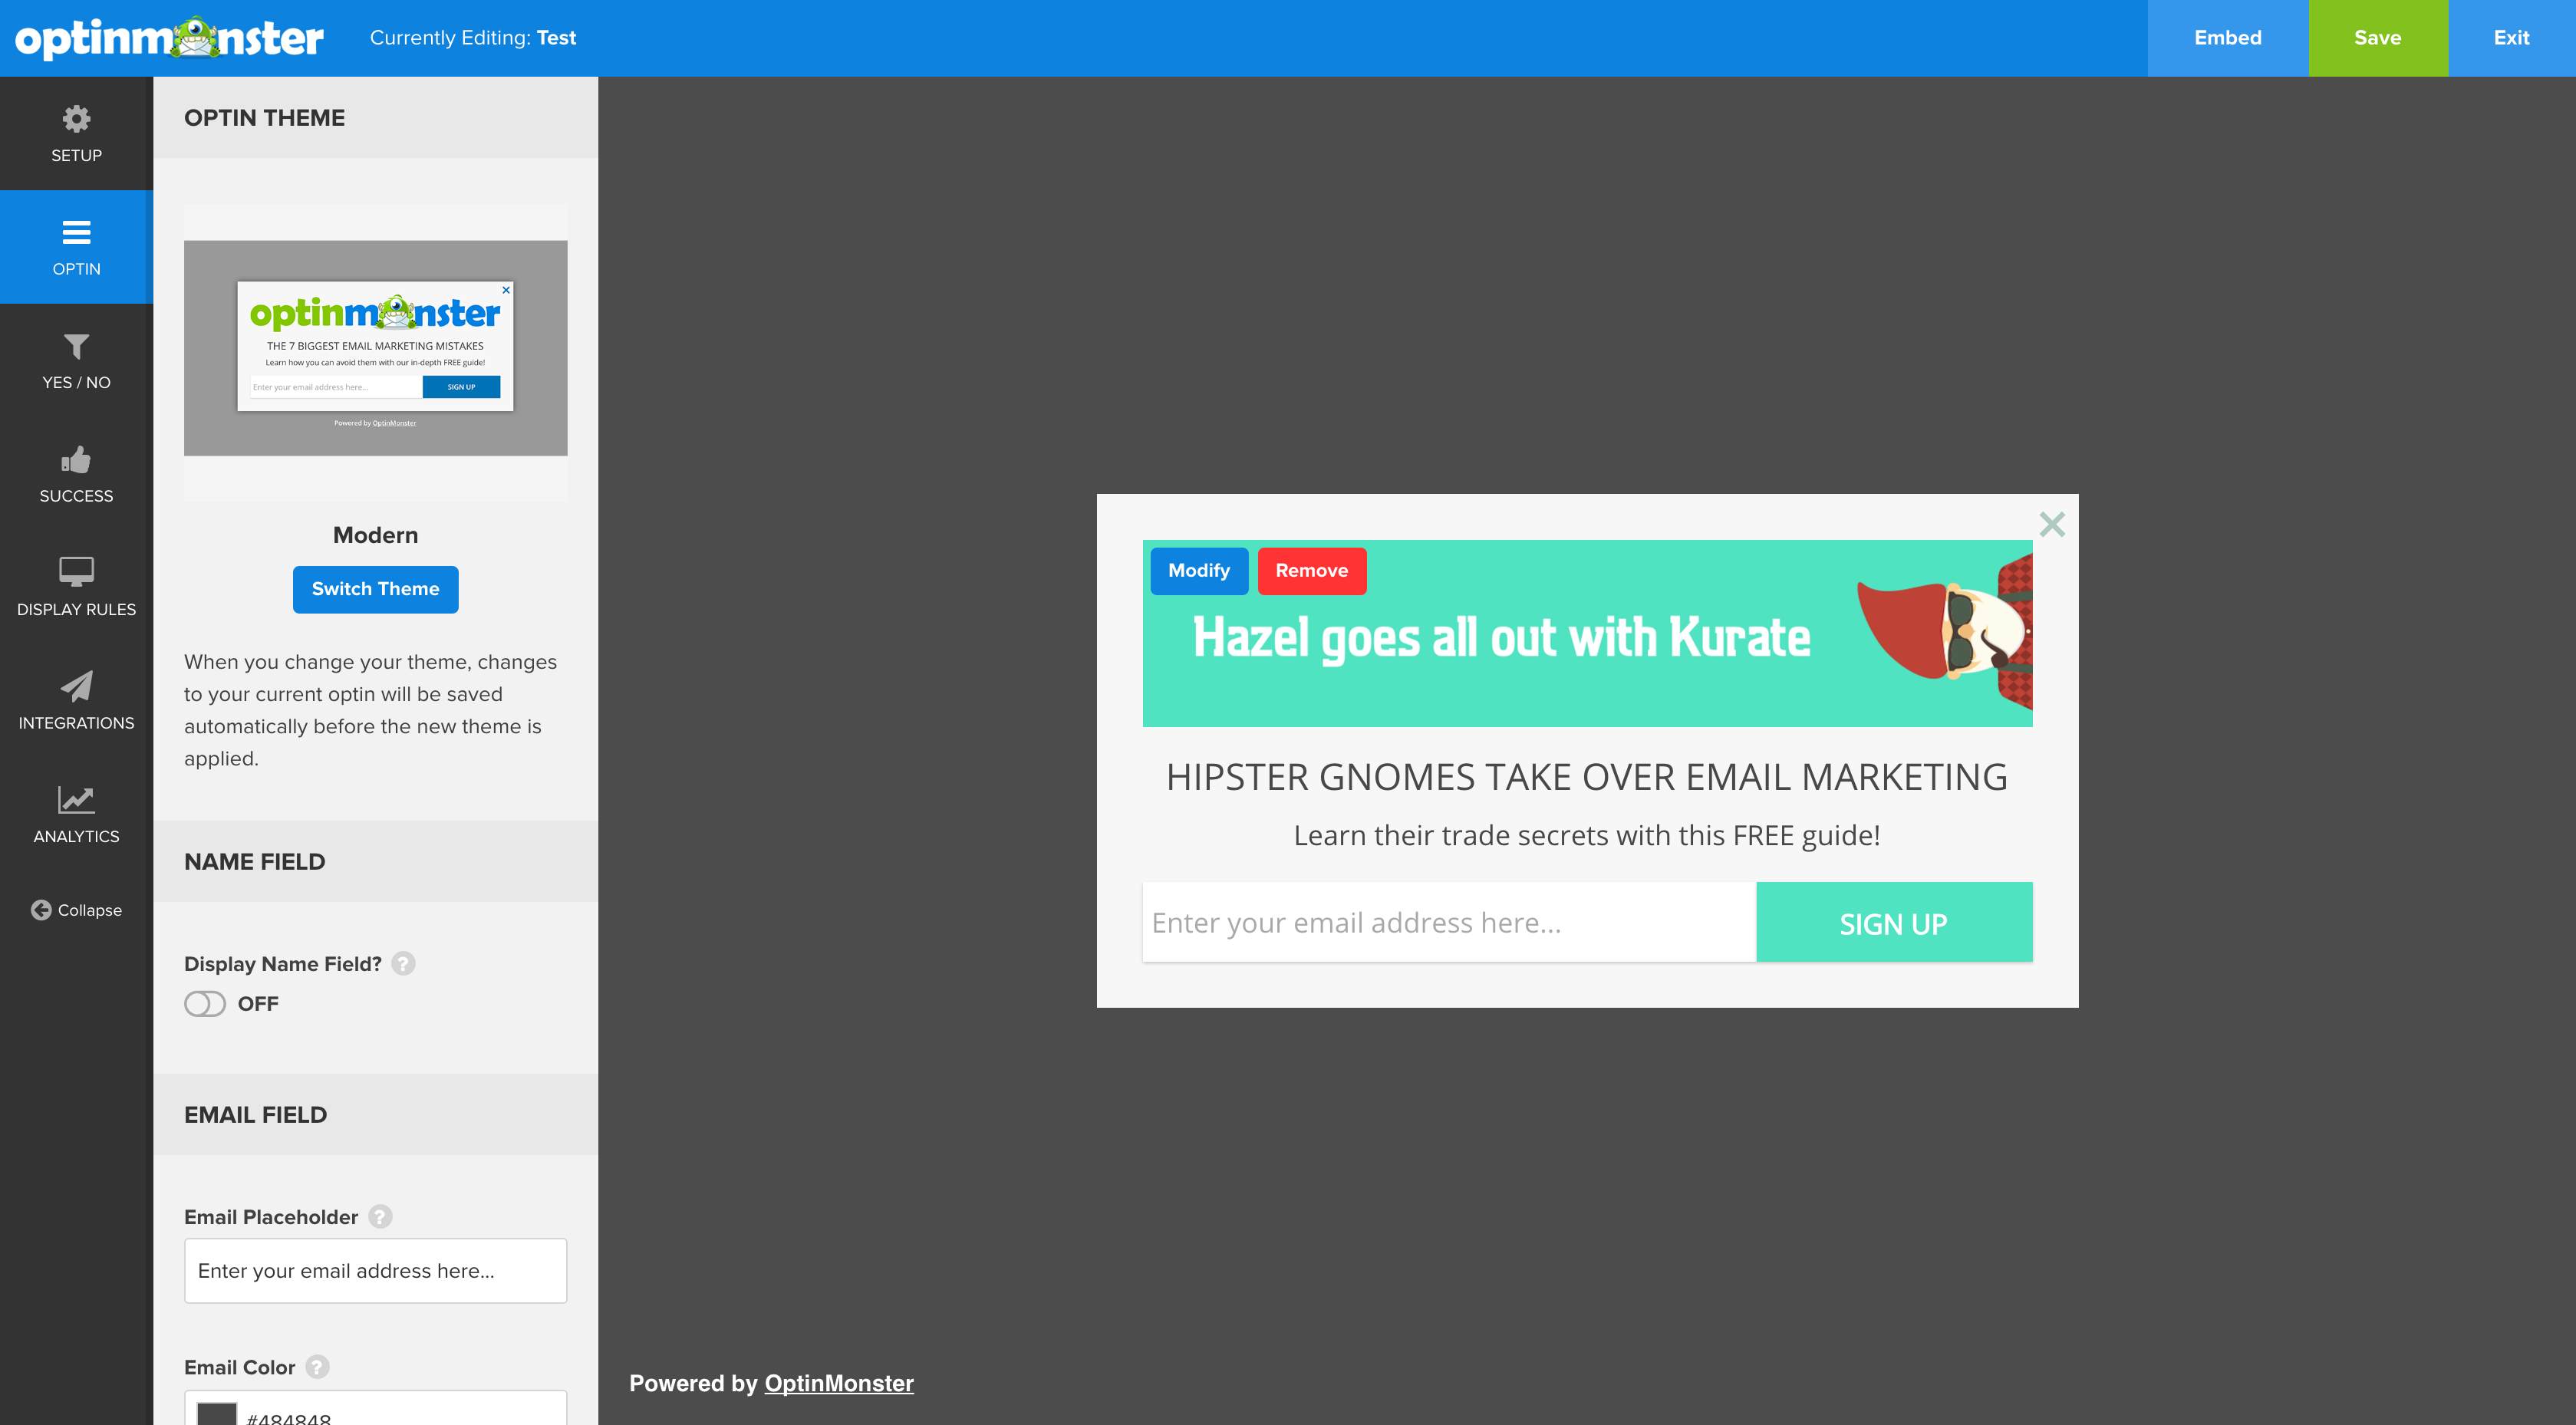
3. Start and Design a New Optin Campaign
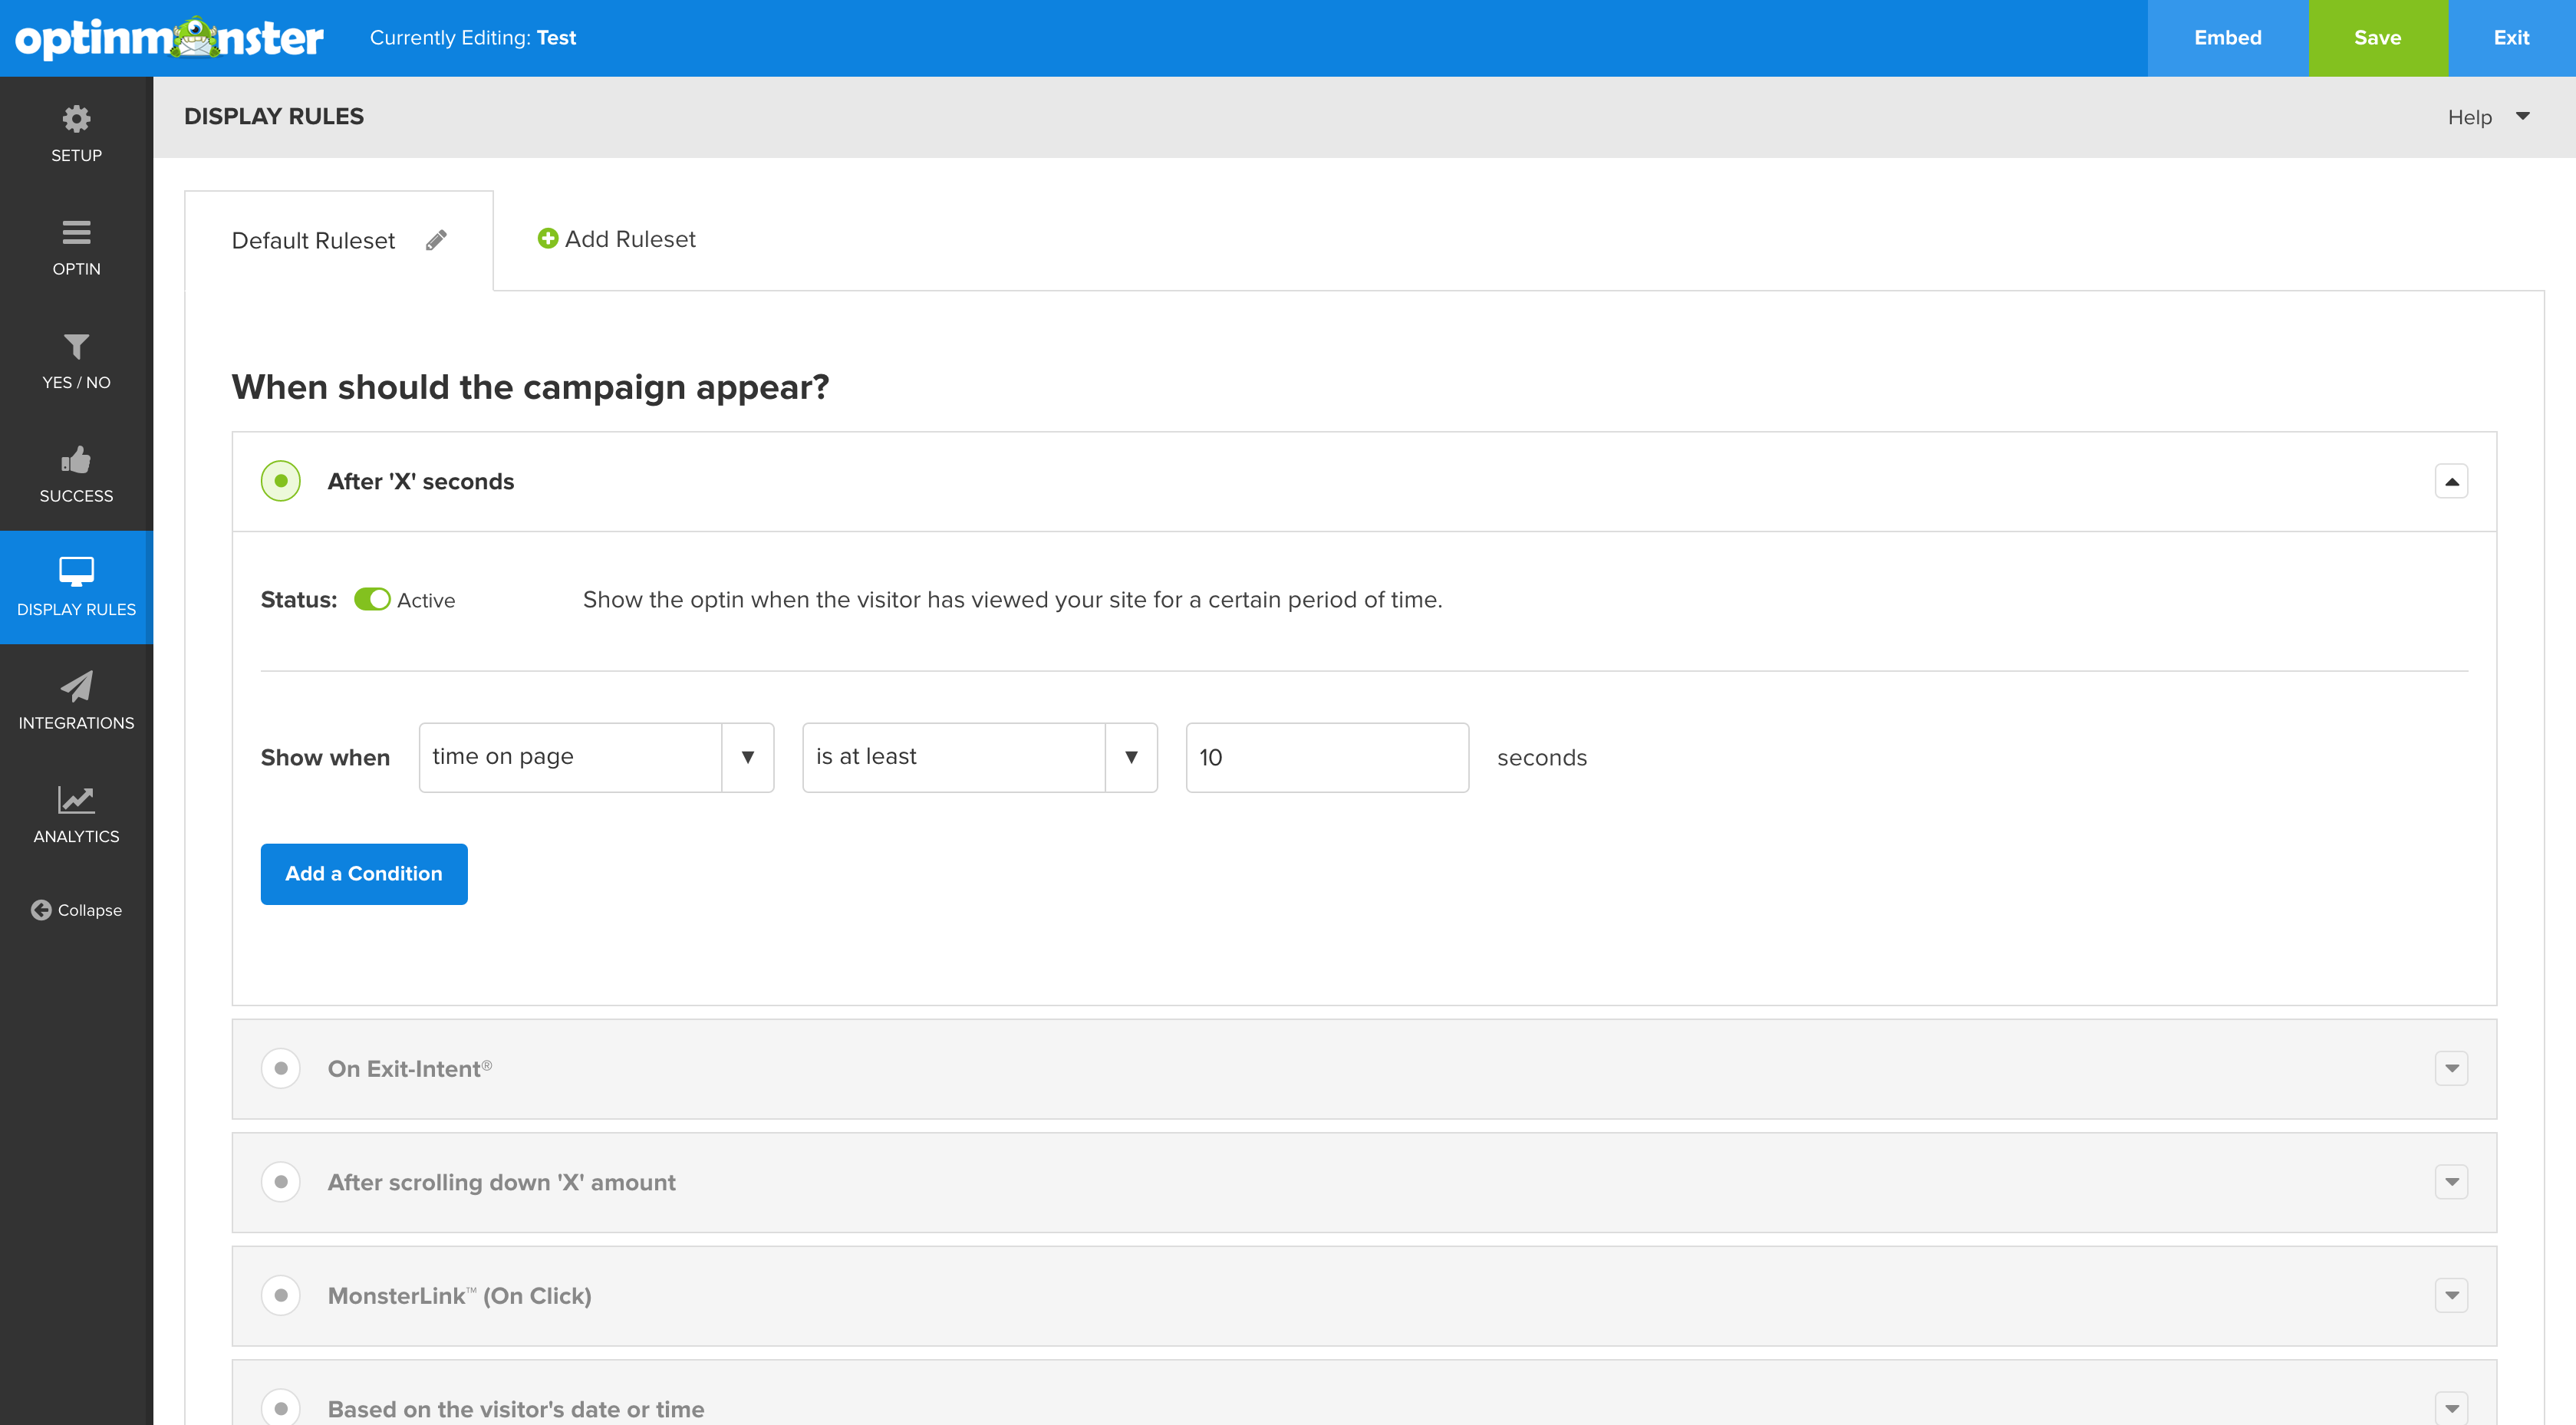
When you start a new campaign with Optinmonster, you will be guided through all of the necessary steps to set up your campaign. We like to use to Modern theme template. It looks clean and it’s easy to set up. You can spend as much time as you want changing the settings to figure out how to convert the greatest number of subscribers (we’ll cover this later in A/B testing), but for now we suggest setting up a simple giveaway (e.g. a 3 lesson video course or a 10-20 page e-book) that appears after users have been on your site for 10 seconds.
4. Connect Your Campaign to Emma
After you have your optin campaign set-up just the way you want it, you need to connect it to Emma (detailed instructions for setting up the integration can be found here). Use the integrations tab to connect your campaign to your Emma account. Within OptinMonster, you’ll be able to select the Emma group to which your subscribers will be assigned. After you set it up and launch your campaign, your subscribers’ emails will automatically be dropped into Emma and you’ll be able to send them your awesome content!
Sign up for Emma here.
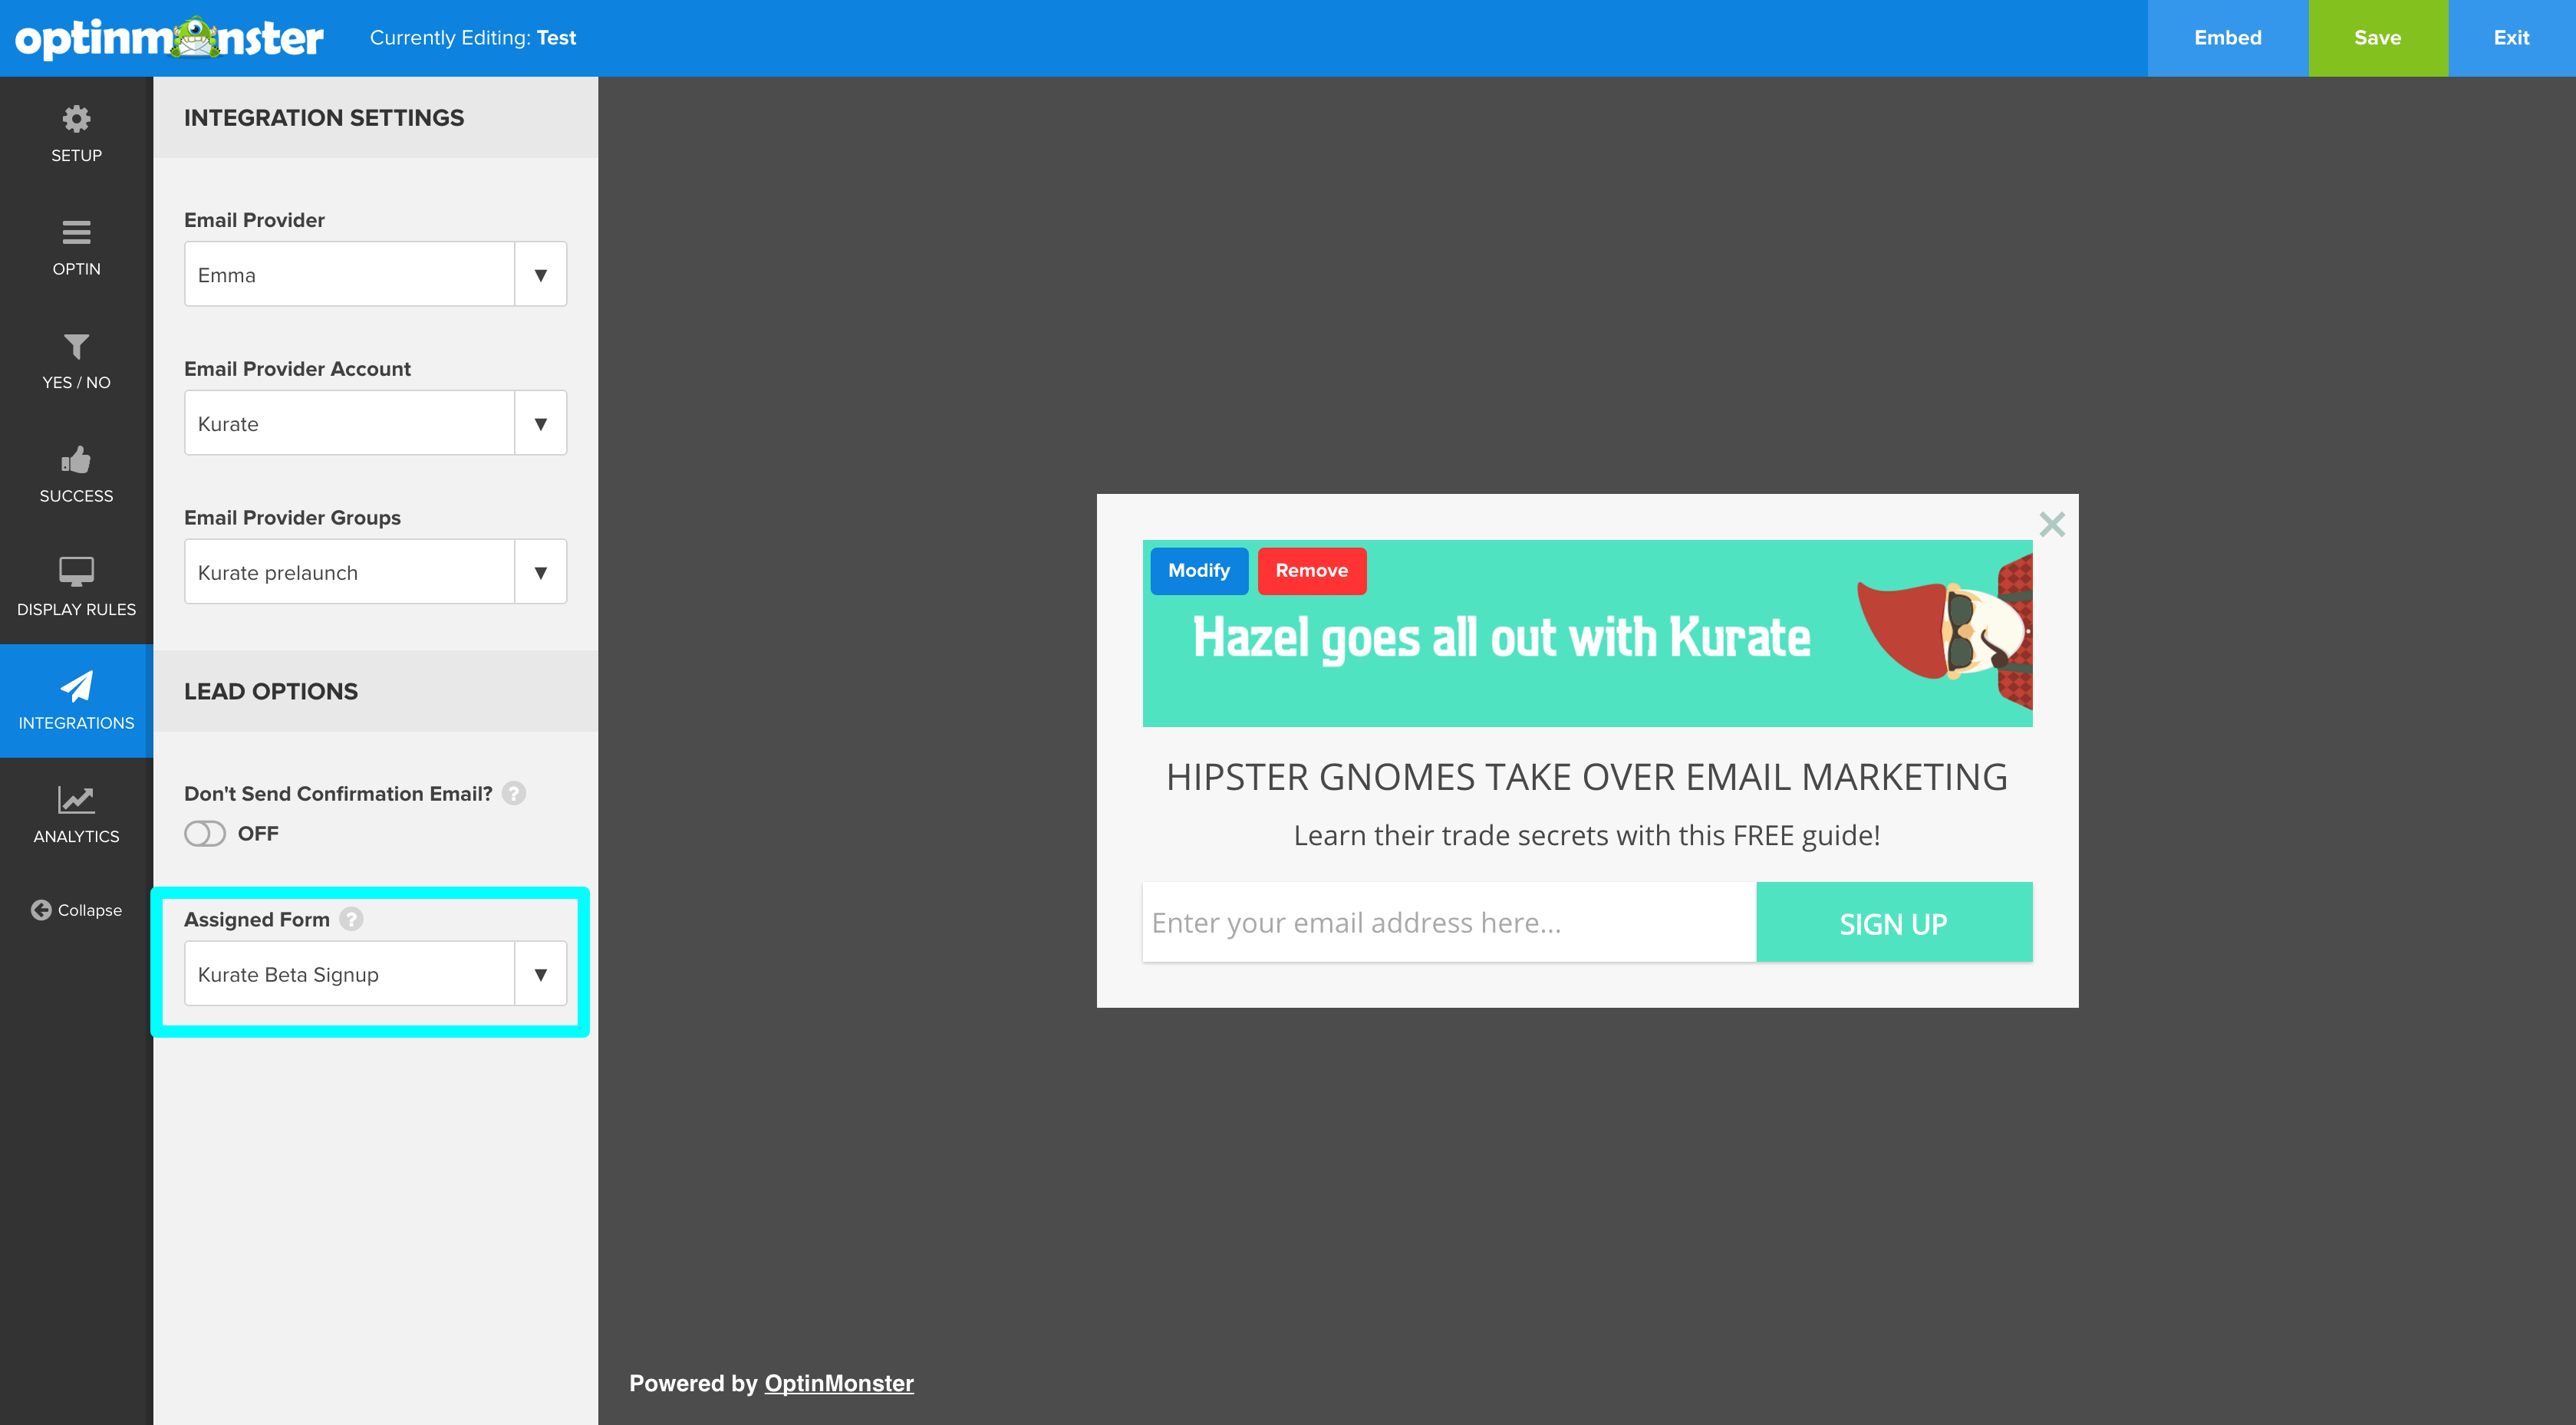
VERY IMPORTANT NOTE: In order to send automated emails through Emma to users subscribed through OptinMonster, you MUST select an Emma form from the “Assigned Form” field. This is highlighted in the teal box below. Then, when you set up the automation in Emma, they will ask you to “Choose your signup sources.” Make sure you choose the same form that you assigned in OptinMonster (second screenshot below).

5. Save your campaign and exit the editor
Check your website to make sure your popup is working correctly.
6. Setup A/B Testing
The greatest thing about Optinmonster is the ability to easily setup A/B testing. Don’t know what A/B testing is? Basically, it allows you to automatically test multiple versions of the signup form (different words, another image, etc.) in order to gather information about which form lends the highest conversion rate. Optinmonster makes this super easy. Once your campaign is up and running, head to your account page https://app.optinmonster.com/account/. Click the split-testing icon next to the edit button and another button will show up below your campaign that allows you to “Create a New Split Test Variation.” Once you click the button, name and describe your split test and your campaign will be duplicated. You can make any changes you’d like to the new version and it will automatically rotate when users visit your site. After a few days, you’ll be able to see which version offers a better conversion rate.
And viola, you’re done! Follow these steps, and you’ll create your first OptinMonster campaign. After you’re done, sit back and watch your list grow.
Ready to take your email automation to the next level?
Kurate.it sends emails from WordPress through Emma. Choose a plan or let us help you customize your kurate campaigns and get started today!